Checkerfloor!
☆ April 15, 2010
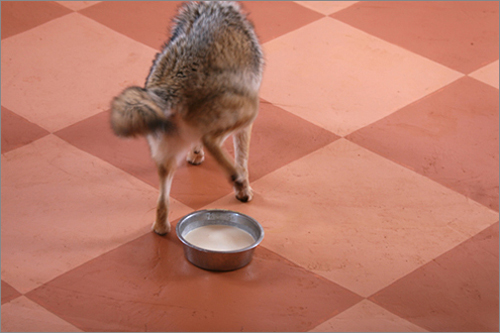
Charlie has a rather annoying winter habit of territorial pissing, as he charmingly demonstrates here with a bowl of milk. This only happens in the winter, a mimic of behaviour he’d be doing in the wild. (More background here and here.)
It did not take long for me to get completely fed up with cleaning the ugly, bare concrete floor (I don’t have “before” photos but just picture a sidewalk) so I decided to paint it with an easy-to-clean semigloss paint. The checkerboard pattern was surprisingly easy to create…. Here’s how!
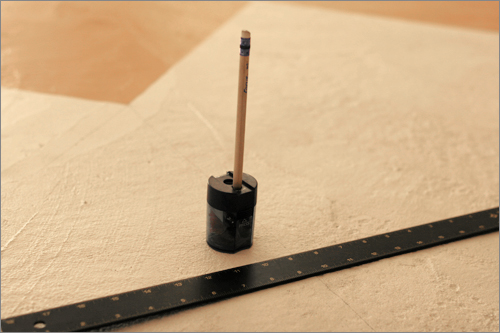
I thoroughly cleaned the floor and painted it with two coats of white primer. With a yardstick, I measured out 18 inches from one wall, at several points from the wall, so that I could then draw a straight line 18 inches out, parallel to the wall. Then I moved over to that line I had just drawn, put one end of the yardstick against that line and did the same thing to create another parallel line 18 inches further out, and so forth across the WIDTH of the floor.
Then I measured 36 inches DOWN one of the lines (from the wall perpendicular to the wall I had just been working from) and made a mark. Then measured 36 inches further down and made another mark and so forth, down the whole length of the line. The next line over, I measured 18 inches down from the wall, then 36 inches from there, and continuing at 36 inches. This is because the marks on the lines need to be staggered for the diamond/square pattern. On the third line, I measured 36 inches from the wall and down the line; the fourth 18 then 36. Confused yet? It’s not confusing when you’re doing it.
I found it helpful to keep the pencil very sharp.
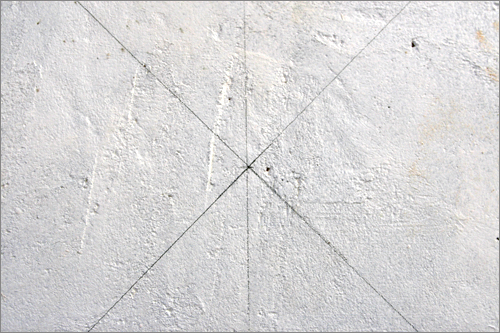
At this point I had my main lines crossing the width of the floor, and my marks down each line at staggering 36 inch intervals. Then I just connected the marks! Using the yardstick for a straightedge, I drew diagonal lines connecting the marks which created the checker/diamond pattern.
The faint line going North-South in the photo above is the “main line” and is actually not part of the finished checkerboard. The diagonal lines are connecting the 36 inch marks to form the diamonds. (They are technically squares but turned on point so they look like diamonds when you enter the room.)
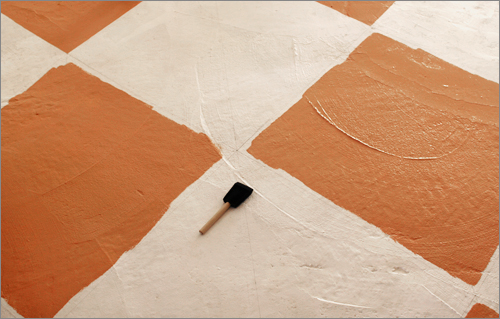
I used a roller to fill in the centers of the paler-colored squares (they look orange here) and then did the edges before painting anything with the darker color. A one-inch sponge brush worked supremely well for the edges and corners.
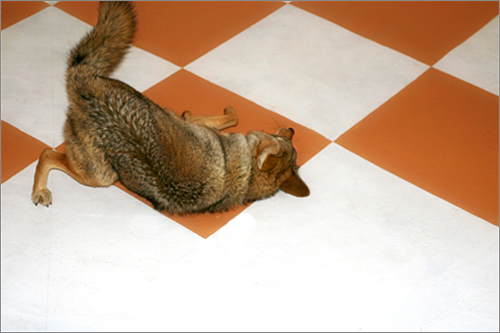
Charlie was very taken with the colored paint.
After I finished all the pale-colored squares, I painted the darker-colored squares.
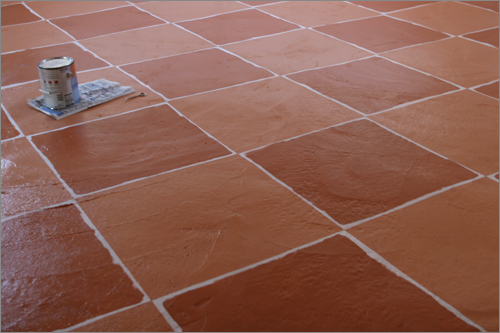
This is the floor before I did the edges of the darker squares with the sponge brush. I should add that I used two coats of paint throughout. (One could then seal it with a clear coat but I didn’t.) This photo shows the true colors of the floor, which I matched to the red dirt wet and red dirt dry.
Bonus: muddy paw prints aren’t as noticeable!
I really adore this floor.
It transformed the room, and made the irregularities of my hand-spread concrete look less hillbilly, and more like the floor of a rustic French cafe. Hurrah!
I’m writing this post in the middle of the night so I have no idea if my directions are coherent. Feel free to leave questions in the comment section and I will clarify!
Comments
34 Responses to “Checkerfloor!”
Leave a Reply
MY NEW BOOK!


More, Elsewhere


- No Tweets Available


April 15th, 2010 @ 6:33 am
just sketched it out….voilà!
once again, your love for Charlie has sent you into problem-solving mode, and you’ve come up with something from nothing!! comme paris!!
‘pissing’ inside the house isn’t so hilarious when you need to mop it up, but, once again, you’ve made a charming story of it!
you grace the wild west with your words, your images, and your sophistication.
rock on, girl!!
April 15th, 2010 @ 6:36 am
All I need is a house to do this to. Thanks for sharing Shreve – this actually made sense to a non-numbers, disabled-at-measuring, anti-math kinda girl. :)
April 15th, 2010 @ 7:00 am
Shreve, can you show us photos of the house with the furniture filled in? I loved seeing the interior of the famous jellybean camper on your Kentucky gal’s website–gives us a sense of the coziness and space saving techniques you all use–I’ll bet they’re clever!
April 15th, 2010 @ 7:12 am
Shreve, I may have to borrow this idea. I have a concrete sunken living room that was carpeted. My husband and I recently removed the carpet and we were going to put hardwood floors on top of it thinking it may hold up to our dogs better, but it is so expensive. Carpet doesn’t last and holds odors. This seems like a great inexpensive alternative, it is just deciding what colors to choose!!
April 15th, 2010 @ 7:56 am
Well, that’s an effective way for Charlie to make sure nobody else drinks his milk!
What was there before you poured the concrete? And doesn’t the floor get awfully cold in the winter?
Thanks for sharing your painting technique.
April 15th, 2010 @ 8:21 am
The floor is beautiful! The lines of the paint appear very precise and I think the texture (I believe you referred to it as hillbilly) of the concrete is just right–a nice contrast. The colors are great, too.
April 15th, 2010 @ 8:27 am
Very nice! I wish I had a concrete floor to try this on, and those colors are beautiful.
April 15th, 2010 @ 8:28 am
Dana just needs to use the colors of her dirt wet & dry.
That was a brilliant idea. I remember seeing a bit of the Terra Cotta color in an outside picture and loved it. Made me curious to see the whole thing.
The floor looks great!
April 15th, 2010 @ 8:57 am
I am impressed. What a beautiful project. Wow.
April 15th, 2010 @ 10:30 am
Lol @ keitha, I might just do that. You never can go wrong with earth tones.
April 15th, 2010 @ 10:33 am
reminds me of when my mom ordered carpet and they asked what color she wanted and she said “dirt”…same thing when she ordered tile for the kitchen. and surprisingly they matched it pretty good. you did a good job! just another thing to add to your resume =-)
April 15th, 2010 @ 10:48 am
Amazingly well done. To me, it seems like an immense amount of work, especially the detail work. Then again, a careful paint job probably isn’t daunting after you’ve built the rest of the house! How long did it take to do it?
I’m undergoing treatment for Lyme disease, which I’ve had for about 15 years, and Epstein-Barr Virus related chronic fatigue, which I’ve had for about 7 years. The antibiotics also leave me wiped out, so that somedays doing things like laundry and dishes leave me in tears. I can’t imagine doing the amount of work you do!! I so envy your energy and strength.
Thanks so much for this incredible window into Wyoming.
April 15th, 2010 @ 11:44 am
Ok, so I just got introduced to your blog and your website here. I am so addicted to it! I love you and everything you have done with Charilie! You are so amazing. I am 32 myself and agree that the 30’s are the best! My friend Holly at work and I want to meet you someday. If we ever take a roadtrip to Wyoming we totally want to have coffee with you.
P.S. Your cowboy poster is fabolous! You are one lucky lady! :)_
April 15th, 2010 @ 11:47 am
I love the new floor. It looks great.
April 15th, 2010 @ 12:31 pm
I find it interesting and useful to keep records of poems, art and stories as they progress to their final forms. Glad to see you documented your floor in similar fashion.
Finished product looks lovely, coyote pee and canine / feline pawprints aside.
April 15th, 2010 @ 1:42 pm
What a great job you did; I use the blue tape to mask and sometime paint still bleeds on the next line ( stripped faux wall-paper) which drives me nuts, the flat sponge is the key here and lots of patience( that you have !!) Congrats on the floor ! Still cannot get over how big cisco is !
Secondhandrose.com in NYC has the greatest collection of vintage wallpapers and linoleums . Great inspiration there ! Being shopping there for 30 years when I am in NYC.Rarely though now, I can’t stand the airports nazi tactics anymore…
April 15th, 2010 @ 3:21 pm
Aha!! Something I can tackle my basement floor with!!! I bought an old character home (built in 1913) and the basement is side-walk looking, but I think this will do the trick nicely!! Thank you and your floor looks unique and wonderful!!
April 15th, 2010 @ 4:59 pm
Catherine. Here’s the trick to painter’s tape. Say you’re painting blue on white. After you put the tape down, paint the edge with the white background paint and let it dry. If there’s any bleeding under the tape, it will be the same color as the background. It will also seal the edges. Then paint the blue over.
Peel the tape before the paint is completely dry. That way it won’t tear, like latex sometimes does.
There is paint made specifically for concrete, both primer and tint. Best to use concrete paint, then put a sealer on it.
April 15th, 2010 @ 7:50 pm
matching the paint colors to the biggest contributor to your dirty floors was a stroke of genius.
i am ~so~ glad you posted this before i decided on how to redo my kitchen this summer!
i’ll be sure to send positive thoughts your way every time i decide that a good sweeping is all that’s needed and that i can hold off on mopping. :)
April 16th, 2010 @ 12:21 am
I am impressed with both Charlie’s aim and your ingenuity! Looks like I’ll be exchanging the roll of vinyl I just purchased to cover the concrete floor in my cat room for a few gallons of paint instead. Painting relaxes me and I will find any excuse to paint walls…it just hadn’t occured to me to bring it to the floor. So…thank you for saving me a buck or two and giving me another chance to paint! :)
Your floor looks lovely!
April 16th, 2010 @ 5:28 am
As we say in the south, ain’t you something, girl, ain’t you just. That floor is gorgeous. Have a great massage. I hope you end up completely noodlized.
April 16th, 2010 @ 9:33 am
Your floor is so cool! Love it. And love the pic of Charlie rolling on it. Really cute.
April 16th, 2010 @ 11:45 am
Love the floor! Those colors are gorgeous.
(Enjoy the massage tomorrow!!!)
April 16th, 2010 @ 12:59 pm
The floor looks amazing! I live in a beautiful suite with one draw-back — painted concrete floors. The landlord has painted them a very light colour and they show everything and by now are quite scuffed and REALLY ugly. Plus they no longer EVER look clean. I might try running your design by him :)
April 16th, 2010 @ 3:50 pm
Thanks MLaiuppa I will give it a try, I love peeling the blue tape, sometime it comes out perfect, what a miracle….
April 16th, 2010 @ 7:37 pm
Have a wonderful time tomorrow. I’m shooting a wedding then, so I’ll have mine next weekend. Totally relax and feel great.
April 16th, 2010 @ 8:29 pm
Shreve, You never fail to amaze me,,,is there anything that you can’t do? I love your spirit, your attitude, your caring for Charlie and ALL the animals. You are truly an inspiration to me in so many ways.
The floor turned out beautiful!!
April 20th, 2010 @ 2:08 am
sibzooria, Buy Cheap Phentermine, Loumnsloldbom, soma, Misaexpininix
April 20th, 2010 @ 8:05 am
Shreve,I neeed to paint my basement floor before I move. What a great idea you have given me. I’m sure the new owners will also love the design.
April 20th, 2010 @ 12:49 pm
Love both this blog and the Daily Coyote. I’ve been following the Daily Coyote for a few years now. My question is this – I was fascintated when you wrote about building your house – and was wondering if you ever plan on posting pictures of it. I’d be really interested to see how it turned out!
April 26th, 2010 @ 4:54 pm
Great job, but I strongly advise you to seal this floor asap. If you used a latex house or floor paint, seal with 3 coats of Ben Moore’s Stay Clear Polyurethane. It is waterbased and does not yellow or change the color. You can roll it on and it is best to do 1 coat each day, for 3 days. Wait 24 hrs. before putting furniture back. This floor will chip and scratch, especially with dog nails, so go the extra mile and add the sealer to help protect all your hard work and make this floor more durable. :-)
April 26th, 2010 @ 7:27 pm
Carol ~ Thank you for that suggestion and for narrowing the sealer options down! Now I might do it!
May 4th, 2010 @ 2:00 pm
Hmmm… the house we’re buying has a large storage shed with a bare floor– probably concrete– I wonder if this might work there…
March 10th, 2021 @ 12:29 am
Thanks for some other magnificent post. Where else may anybody get that kind
of info in such a perfect way of writing? I’ve a presentation next week, and I’m on the look for
such info.