Photo Tutorial: Window Light
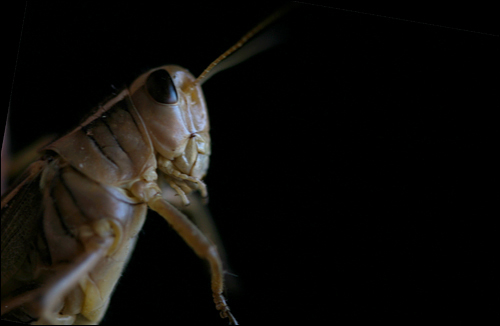
I have Farmily posts half-written and a self-imposed deadline of Monday for something completely unrelated, but, as all writers know, deadline = procrastination!! And so I thought I’d do a little tutorial on my grasshopper photograph, because truly, it is one of THE most rudimentary set-ups there could possibly be.
Total time between conjuring the thought “I’m going to take a grasshopper pic” (and seeing this final in my mind’s eye) and uploading the photo to my computer was about 90 seconds. No joke. And Photoshop was used only to resize the image for posting on the internet ~ the image has not been tweaked or adjusted.
Window light is gorgeous light; the shadows it creates have a very soft edge, and the light wraps around objects in a most beautiful manner. It also has an extremely high rate of fall-off. When your subject is close to the window, it is illuminated by the light coming in the window and the camera picks up on this light. But as you travel away from the window, the light becomes exponentially less powerful. It becomes dimmer. To such an extent, in such a short amount of space, that the camera can no longer ‘see’ it.
Here’s a diagram. If you can’t decipher it, that probably means you’re sane. I held the grasshopper by his hind legs with his face directed towards my kitchen window, which is a fairly small window. I determined the exposure for the grasshopper and knew that everything behind the grasshopper would be unexposed. Black. Thanks to fall-off.

We can see that window light illuminates things that lie further away from the window because our eyes can pick up on a vast range of light (exposures) at the same time. Film (or digital chip) is different ~ while it can record all manner of light, it can only record a certain range of exposure at one time. Therefore, at a certain distance away from the window, the light does not register to the camera at all when you are exposing for the subject closest to the window. While it depends on the intensity of the sun and the size of the window, this distance is generally measured in inches. Now, if I had used flash in the picture above (barf!yuck!) you would have seen various jars, stacks of papers, and a pineapple.
Regarding exposure in this situation: your camera settings might calculate this for you IF you use spot metering. Another trick is to hold your palm out, facing the camera, in the place you would like to meter (where your subject is). Make sure your hand fills your viewfinder and meter your hand (pressing halfway down on the shutter will accomplish this on most digital cameras). Note the exposure and set your camera as such using the Manual setting. And, digital cameras allow you to check your exposure after one shot and adjust accordingly, so play around.
As for equipment, I used a 100mm Macro lense for this shot on my Canon 30D body. I have three lenses: 28-70L zoom, 70-200L zoom, and 100Macro fixed. My camera body, a Canon 30D, is BOTTOM of the line ~ I believe it’s considered an amateur model and I know it’s not even being made anymore. But I’m not going to spend $5K on a camera body ~ an expensive camera does not guarantee anyone great photographs and great photographs can be made with a very basic camera. I DO believe in high quality lenses. (That’s why I only have three lenses, acquired over the course of many years!) The quality of glass does affect the end result ~ your photos will only be as good as your glass. So, my motto has always been cheap body, splurge on the lense.
Hope this helps and demystifies the process of this photo! It’s SO basic. Anyone can apply this technique ~ this light is particularly beautiful on faces.
The Fence Post
I built a fence. I needed a fence to keep Daisy and her disciples out of my gardens and my home ~ Daisy has broken deck boards and patio stones and even tried to waltz right in my open door (Exhibit A).
I wanted to build this fence myself. Mike showed me the steps, he sharpened my ax, and then he reluctantly left me to my own devices. And I discovered I have some pretty kick-a** devices. I built this fence!! A post and rail fence. Posts are vertical. Rails are horizontal. And I do believe you can build one, too, if ever you should want. Here’s how:
First, become a PhD. The useful kind: a Post-hole Digger! OOH! No offense, other-kind-of-PhDs!!! {I don’t know what got into me.} Dig a hole at least 18″ deep. Eighteen inches to two feet will do the trick.
Rural wisdom: the key to setting a sturdy post is to pack all the dirt that came out of the hole back into the hole with the fence post. Shovel in some dirt, tamp it down, shovel in some more, tamp it down some more. Do this and the post will not budge.
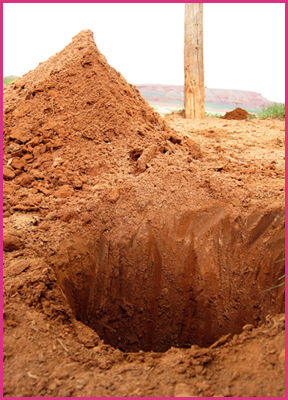
Hole dug. Post set in the background. I scavenged posts from my neighbor ~ these are treated posts and so, while the visible part is weathered, the part in the ground still looks totally new. Treated posts keep the wood from rotting ~ if you don’t use treated wood, your posts will rot and your fence will fall down and you’ll have to start all over again!
An exception: Cedar posts need not be treated. Cedar does not rot and will last for generations ~ longer than treated posts, even. But there weren’t any of those laying around in my neighbor’s “the-more-you-take-the-less-I-have-to-clean-up” pile.
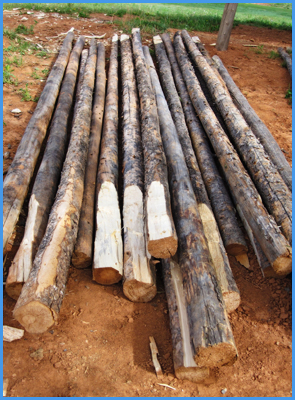
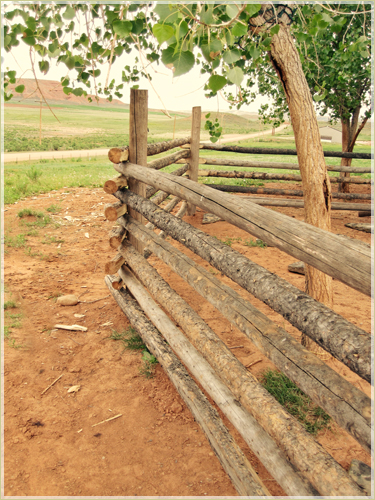
For the rails, I used pine trees that Mike and I got from the mountain, from a special spot we call the Pole Patch. These are tall tall skinny skinny trees that died long before we arrived to gather them. If you use green wood you will have issues as the wood dries. These poles are about 12 feet long, so I set my posts 10 feet apart.
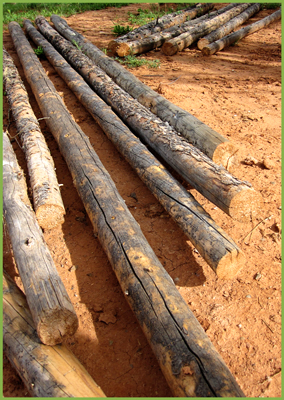
One could nail these up as is, and many people do just that. BUT. If you nail a round pole to a round post, the point of connection is just that: a point. It’s weak, and the roundness of the pole allows the pole itself to roll, ever-so-slightly, via gravity or whenever someone climbs over the fence, etc. Over time it will work its way loose, eventually pulling the nail out of the post, and your rail will fall off.
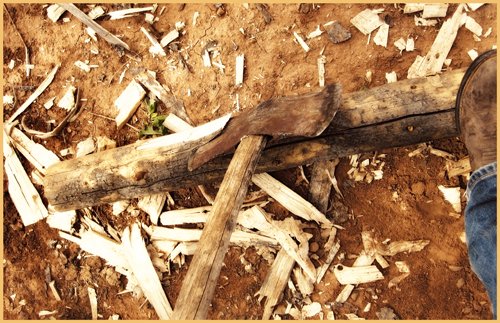
The remedy is simple and fun. With a trusty ax, I flattened a section on both ends of each rail. I anchored the pole against the ground with my foot and shaved off flakes of wood to create the flat area. To help visualize: the movement of the ax is similar to a golf swing. The resulting flat area goes up against the post, creating a wide, flat, secure area of connection.
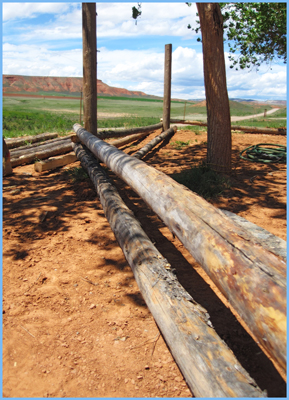
Poles with ends amended.
Once you have your poles ready, you get to nail ’em up!
With really big nails:
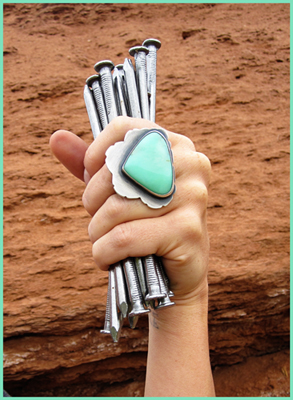
I should note that I do not wear giant rings while I’m working. I wear leather gloves. But I also don’t take pictures when I’m working; these photos were all taken on breaks, whilst adorned.
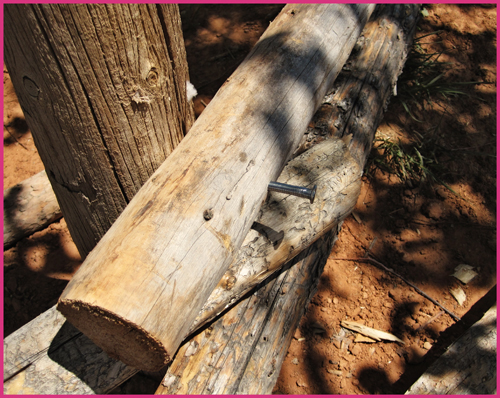
A nail, gleaming ever-so-slightly in the shadows, pounded halfway in.
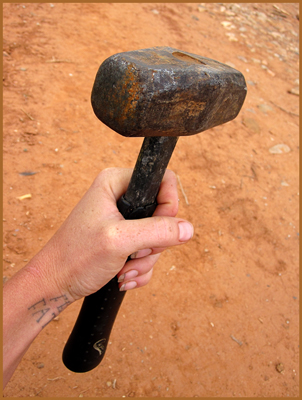
A big iron mallet, to do the pounding.
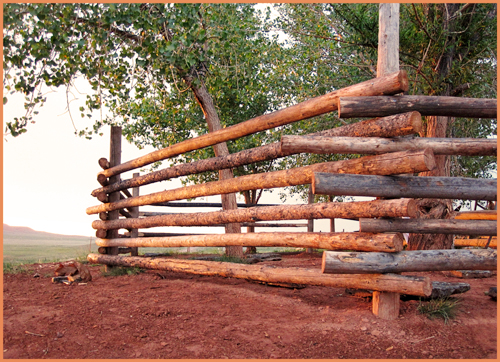
A post and rail fence can be customized to fit your needs, materials, and desires. A two rail fence would have kept Daisy out, but I wanted something more substantial. I built an eight rail fence (though these pictures only show the beginning stages and up to six rails), because to me, an eight rail fence is more unique and more beautiful, and it creates an airy sort of wall around the oasis I am creating around my home.
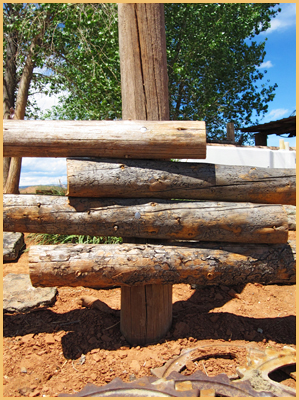
Putting up the first row of poles is key, of course, for everything else grows from there. The poles should not touch the ground and should be level. Nail one pole between two posts. Move to the next section and nail up another pole. This rail will rest on top of the first rail. Then move again and nail up another pole. This rail will rest under the second rail. Diagrams are easier here:
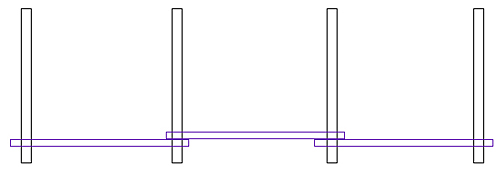
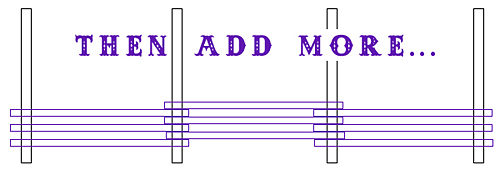
The poles are stacked directly on top of one another at the posts. When the fence is completed, the ends of the rails can be trimmed with a chainsaw so they line up with eachother. This isn’t necessary for the integrity of the fence, it just looks nice. The two bottom rails will be trimmed to match the the rails above, after the fence is done:
The Final Specs ~
Cost: Half a tank of gas to get poles on the mountain + a few bucks for nails.
Length: This fence is 80 feet. I’m already planning another one.
Time: I worked on and off for about a week, when I could find pockets of time between rainstorms and all my other work.
This fence project started as a challenge to myself and from the simple standpoint of functionality but it grew into something so profoundly wonderful. Build a fence like this, and you can build corrals; with a few additional techniques, you can build a cabin.
And now, not only are my veggies safe from Daisy’s unforgiving hooves, I have an elegant structure that I truly love, and which reminds me, with but a glance, of my own strength and ability ~ and what a smile that brings!
Checkerfloor!
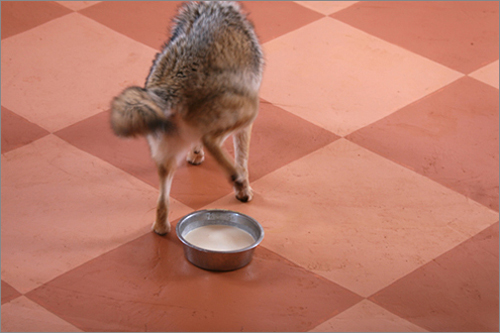
Charlie has a rather annoying winter habit of territorial pissing, as he charmingly demonstrates here with a bowl of milk. This only happens in the winter, a mimic of behaviour he’d be doing in the wild. (More background here and here.)
It did not take long for me to get completely fed up with cleaning the ugly, bare concrete floor (I don’t have “before” photos but just picture a sidewalk) so I decided to paint it with an easy-to-clean semigloss paint. The checkerboard pattern was surprisingly easy to create…. Here’s how!
I thoroughly cleaned the floor and painted it with two coats of white primer. With a yardstick, I measured out 18 inches from one wall, at several points from the wall, so that I could then draw a straight line 18 inches out, parallel to the wall. Then I moved over to that line I had just drawn, put one end of the yardstick against that line and did the same thing to create another parallel line 18 inches further out, and so forth across the WIDTH of the floor.
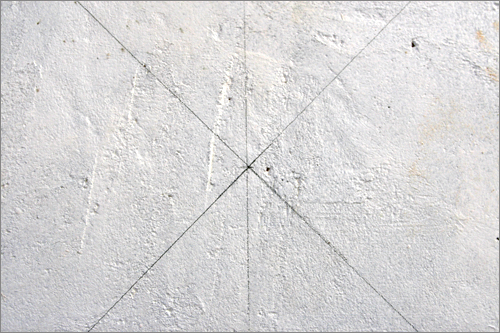
Then I measured 36 inches DOWN one of the lines (from the wall perpendicular to the wall I had just been working from) and made a mark. Then measured 36 inches further down and made another mark and so forth, down the whole length of the line. The next line over, I measured 18 inches down from the wall, then 36 inches from there, and continuing at 36 inches. This is because the marks on the lines need to be staggered for the diamond/square pattern. On the third line, I measured 36 inches from the wall and down the line; the fourth 18 then 36. Confused yet? It’s not confusing when you’re doing it.
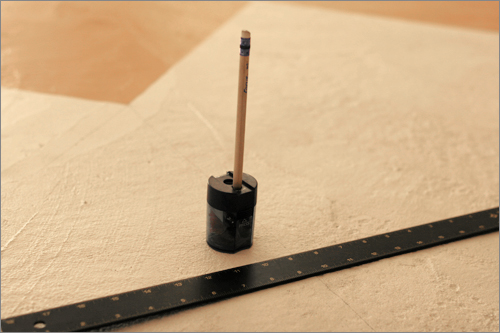
I found it helpful to keep the pencil very sharp.
At this point I had my main lines crossing the width of the floor, and my marks down each line at staggering 36 inch intervals. Then I just connected the marks! Using the yardstick for a straightedge, I drew diagonal lines connecting the marks which created the checker/diamond pattern.
The faint line going North-South in the photo above is the “main line” and is actually not part of the finished checkerboard. The diagonal lines are connecting the 36 inch marks to form the diamonds. (They are technically squares but turned on point so they look like diamonds when you enter the room.)
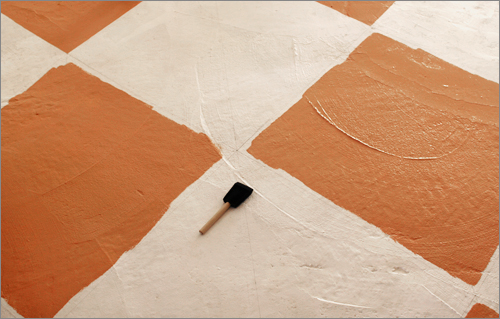
I used a roller to fill in the centers of the paler-colored squares (they look orange here) and then did the edges before painting anything with the darker color. A one-inch sponge brush worked supremely well for the edges and corners.
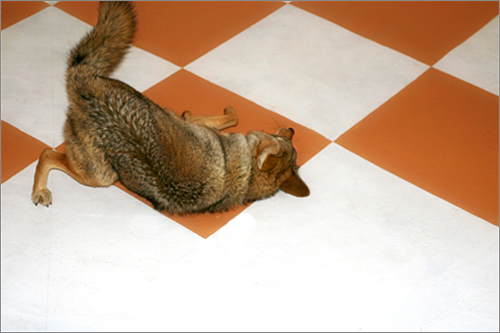
Charlie was very taken with the colored paint.
After I finished all the pale-colored squares, I painted the darker-colored squares.
This is the floor before I did the edges of the darker squares with the sponge brush. I should add that I used two coats of paint throughout. (One could then seal it with a clear coat but I didn’t.) This photo shows the true colors of the floor, which I matched to the red dirt wet and red dirt dry.
Bonus: muddy paw prints aren’t as noticeable!
I really adore this floor.
It transformed the room, and made the irregularities of my hand-spread concrete look less hillbilly, and more like the floor of a rustic French cafe. Hurrah!
I’m writing this post in the middle of the night so I have no idea if my directions are coherent. Feel free to leave questions in the comment section and I will clarify!
« go back
MY NEW BOOK!

More, Elsewhere


- No Tweets Available