Earth Day, every day
☆ April 22, 2010
Holy Mother Earth, the trees and all nature,
are witnesses of your thoughts and deeds.
~ Winnebago wise saying
Out back
☆ April 21, 2010
Fairy flowers
☆ April 19, 2010

There are no blossoming cherry trees where I live.
There are no daffodils.
But there are these.
Tiny fairy flowers tucked beneath blades of grass.
This is Sir Baby
☆ April 17, 2010
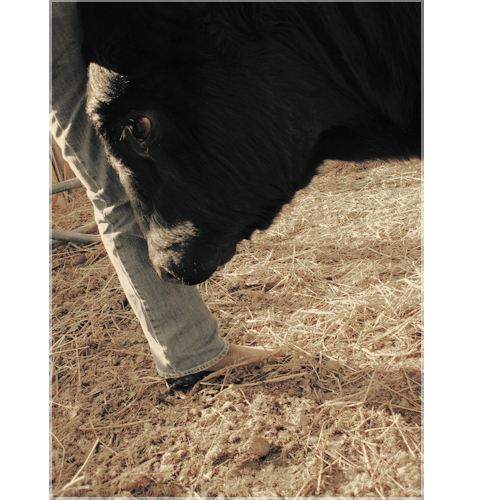
He’s just resting his head there, against my leg. (I look off-balance because I’m leaning weirdly trying to take this photo. At least it’s in focus.)
Sir Baby lumbers over to me, stops, rests his giant forehead against my leg and that is his way of asking “please, oh please, won’t you scratch between my shoulder blades?”
Why yes, Sir Baby, anything for you.
Sir Baby is large. I am not a small person (I’m 5’9″) but Baby makes me look tiny. Old-time-ranchers can’t believe he’s just a year old. He’s nearly twice as large as most yearlings and will at least double in size, if not triple, by the time he’s three.
He is by far the most comfortable of my Farmily furniture. Stretching out on him with a good book or a long letter is one of my favorite pastimes ~ he is so warm and soft, and his huge, thick neck and ample fat layer create a futon of sorts.
For comparison, Daisy is much bonier and her neck is long and slender ~ she’s not really comfortable to lay on, but quite wonderful to lay against. She is the Original Cowch. Frisco makes a nice pillow (this kind of pillow, in black). And Sir Baby is like a water bed. But instead of water, life.
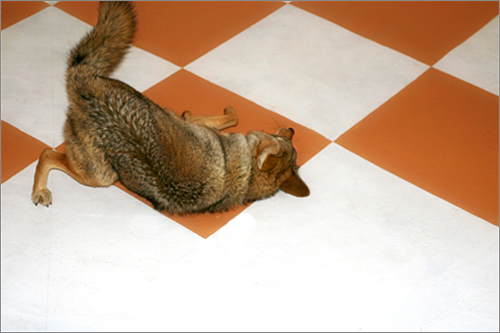
Checkerfloor!
☆ April 15, 2010
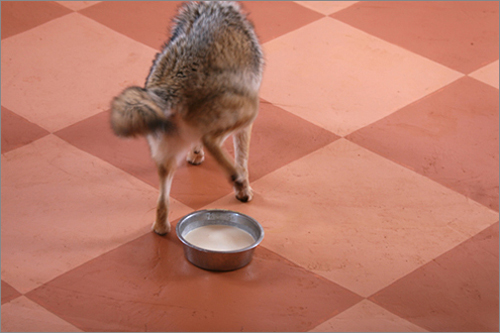
Charlie has a rather annoying winter habit of territorial pissing, as he charmingly demonstrates here with a bowl of milk. This only happens in the winter, a mimic of behaviour he’d be doing in the wild. (More background here and here.)
It did not take long for me to get completely fed up with cleaning the ugly, bare concrete floor (I don’t have “before” photos but just picture a sidewalk) so I decided to paint it with an easy-to-clean semigloss paint. The checkerboard pattern was surprisingly easy to create…. Here’s how!
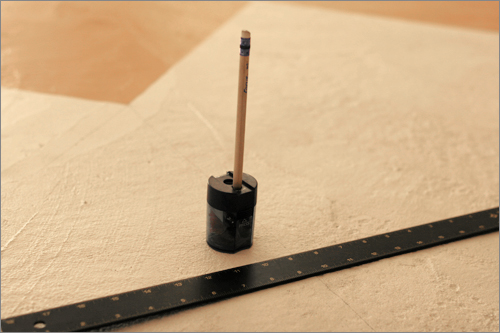
I thoroughly cleaned the floor and painted it with two coats of white primer. With a yardstick, I measured out 18 inches from one wall, at several points from the wall, so that I could then draw a straight line 18 inches out, parallel to the wall. Then I moved over to that line I had just drawn, put one end of the yardstick against that line and did the same thing to create another parallel line 18 inches further out, and so forth across the WIDTH of the floor.
Then I measured 36 inches DOWN one of the lines (from the wall perpendicular to the wall I had just been working from) and made a mark. Then measured 36 inches further down and made another mark and so forth, down the whole length of the line. The next line over, I measured 18 inches down from the wall, then 36 inches from there, and continuing at 36 inches. This is because the marks on the lines need to be staggered for the diamond/square pattern. On the third line, I measured 36 inches from the wall and down the line; the fourth 18 then 36. Confused yet? It’s not confusing when you’re doing it.
I found it helpful to keep the pencil very sharp.
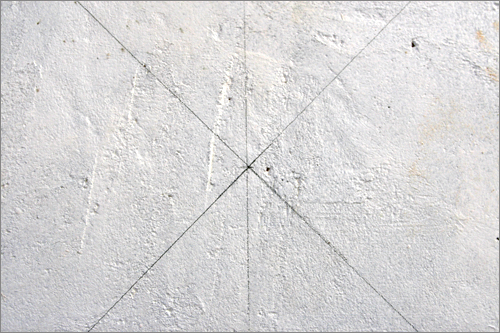
At this point I had my main lines crossing the width of the floor, and my marks down each line at staggering 36 inch intervals. Then I just connected the marks! Using the yardstick for a straightedge, I drew diagonal lines connecting the marks which created the checker/diamond pattern.
The faint line going North-South in the photo above is the “main line” and is actually not part of the finished checkerboard. The diagonal lines are connecting the 36 inch marks to form the diamonds. (They are technically squares but turned on point so they look like diamonds when you enter the room.)
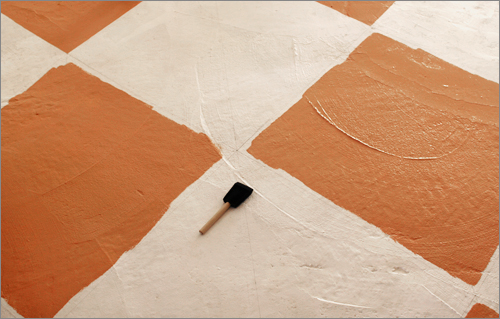
I used a roller to fill in the centers of the paler-colored squares (they look orange here) and then did the edges before painting anything with the darker color. A one-inch sponge brush worked supremely well for the edges and corners.
Charlie was very taken with the colored paint.
After I finished all the pale-colored squares, I painted the darker-colored squares.
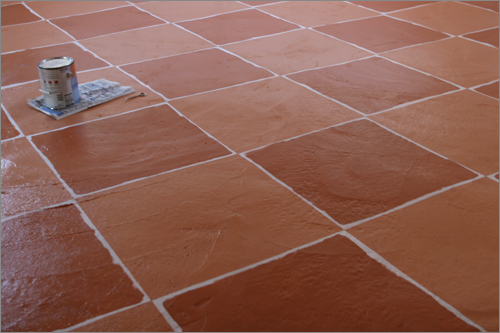
This is the floor before I did the edges of the darker squares with the sponge brush. I should add that I used two coats of paint throughout. (One could then seal it with a clear coat but I didn’t.) This photo shows the true colors of the floor, which I matched to the red dirt wet and red dirt dry.
Bonus: muddy paw prints aren’t as noticeable!
I really adore this floor.
It transformed the room, and made the irregularities of my hand-spread concrete look less hillbilly, and more like the floor of a rustic French cafe. Hurrah!
I’m writing this post in the middle of the night so I have no idea if my directions are coherent. Feel free to leave questions in the comment section and I will clarify!
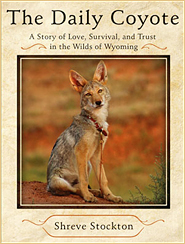
MY NEW BOOK!

More, Elsewhere


- No Tweets Available