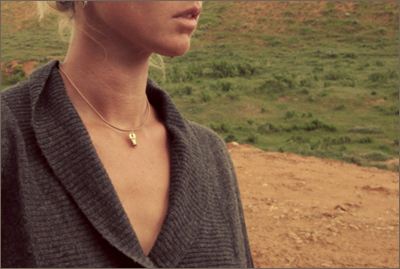
Heart of Brass
We are women.
Sometimes we don’t have to have a heart of gold.
Sometimes we have to fight: to protect our children, our animals, our Earth,
our rights, ourselves.
When the circumstances of your life require you to channel the stealth of Weasel, the focus of Hawk, the all-encompassing awesomeness of Mother Bear, I offer a subtle reminder to slip around your neck.
You are woman. You don’t back down.
Constructed from the brass of a .22 shell.
Strung upon the palest pink leather cording.
In the Shop.
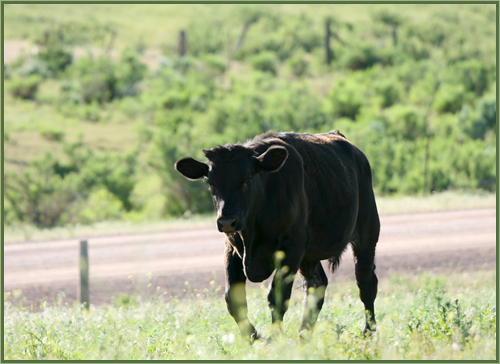
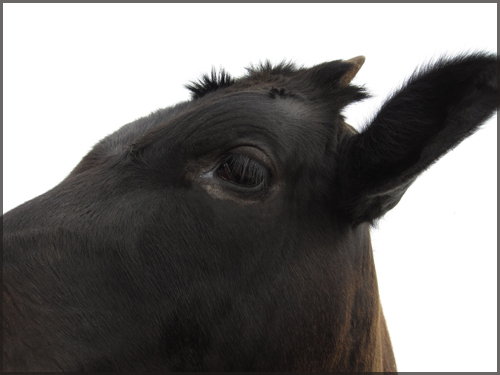
my lumbering love
The Fence Post
I built a fence. I needed a fence to keep Daisy and her disciples out of my gardens and my home ~ Daisy has broken deck boards and patio stones and even tried to waltz right in my open door (Exhibit A).
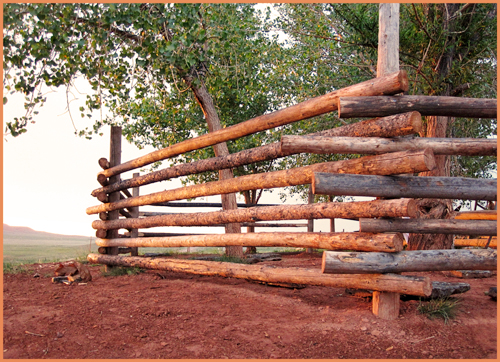
I wanted to build this fence myself. Mike showed me the steps, he sharpened my ax, and then he reluctantly left me to my own devices. And I discovered I have some pretty kick-a** devices. I built this fence!! A post and rail fence. Posts are vertical. Rails are horizontal. And I do believe you can build one, too, if ever you should want. Here’s how:
First, become a PhD. The useful kind: a Post-hole Digger! OOH! No offense, other-kind-of-PhDs!!! {I don’t know what got into me.} Dig a hole at least 18″ deep. Eighteen inches to two feet will do the trick.
Rural wisdom: the key to setting a sturdy post is to pack all the dirt that came out of the hole back into the hole with the fence post. Shovel in some dirt, tamp it down, shovel in some more, tamp it down some more. Do this and the post will not budge.
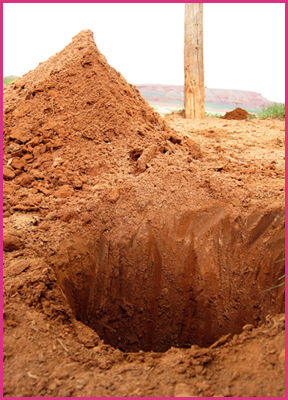
Hole dug. Post set in the background. I scavenged posts from my neighbor ~ these are treated posts and so, while the visible part is weathered, the part in the ground still looks totally new. Treated posts keep the wood from rotting ~ if you don’t use treated wood, your posts will rot and your fence will fall down and you’ll have to start all over again!
An exception: Cedar posts need not be treated. Cedar does not rot and will last for generations ~ longer than treated posts, even. But there weren’t any of those laying around in my neighbor’s “the-more-you-take-the-less-I-have-to-clean-up” pile.
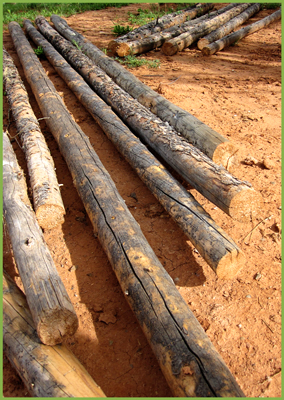
For the rails, I used pine trees that Mike and I got from the mountain, from a special spot we call the Pole Patch. These are tall tall skinny skinny trees that died long before we arrived to gather them. If you use green wood you will have issues as the wood dries. These poles are about 12 feet long, so I set my posts 10 feet apart.
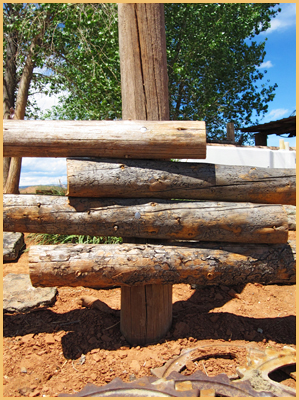
One could nail these up as is, and many people do just that. BUT. If you nail a round pole to a round post, the point of connection is just that: a point. It’s weak, and the roundness of the pole allows the pole itself to roll, ever-so-slightly, via gravity or whenever someone climbs over the fence, etc. Over time it will work its way loose, eventually pulling the nail out of the post, and your rail will fall off.
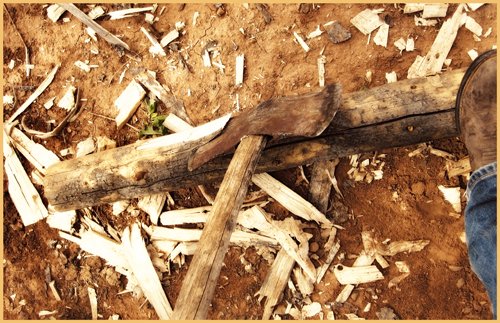
The remedy is simple and fun. With a trusty ax, I flattened a section on both ends of each rail. I anchored the pole against the ground with my foot and shaved off flakes of wood to create the flat area. To help visualize: the movement of the ax is similar to a golf swing. The resulting flat area goes up against the post, creating a wide, flat, secure area of connection.
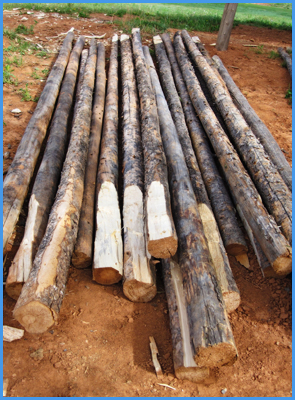
Poles with ends amended.
Once you have your poles ready, you get to nail ’em up!
With really big nails:
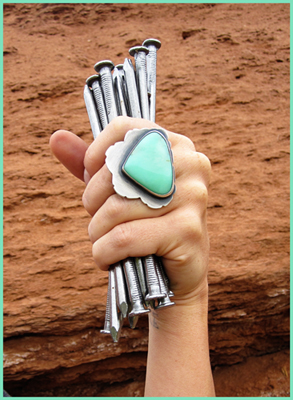
I should note that I do not wear giant rings while I’m working. I wear leather gloves. But I also don’t take pictures when I’m working; these photos were all taken on breaks, whilst adorned.
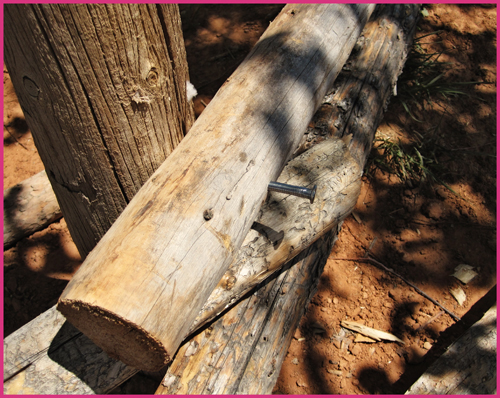
A nail, gleaming ever-so-slightly in the shadows, pounded halfway in.
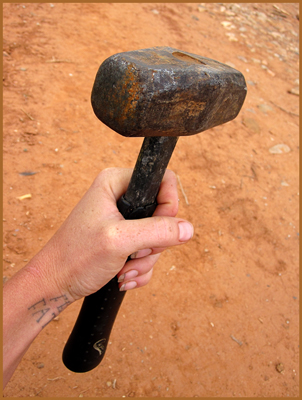
A big iron mallet, to do the pounding.
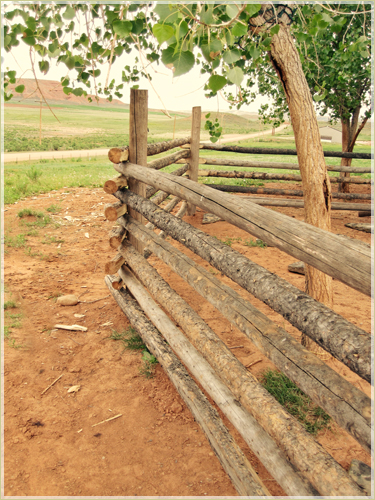
A post and rail fence can be customized to fit your needs, materials, and desires. A two rail fence would have kept Daisy out, but I wanted something more substantial. I built an eight rail fence (though these pictures only show the beginning stages and up to six rails), because to me, an eight rail fence is more unique and more beautiful, and it creates an airy sort of wall around the oasis I am creating around my home.
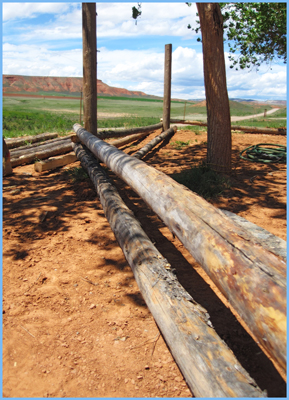
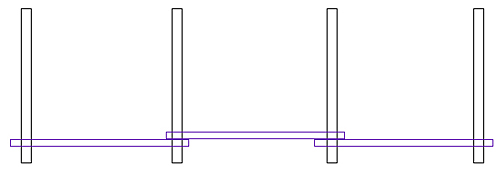
Putting up the first row of poles is key, of course, for everything else grows from there. The poles should not touch the ground and should be level. Nail one pole between two posts. Move to the next section and nail up another pole. This rail will rest on top of the first rail. Then move again and nail up another pole. This rail will rest under the second rail. Diagrams are easier here:
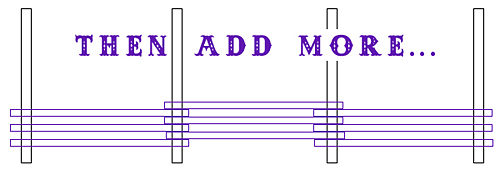
The poles are stacked directly on top of one another at the posts. When the fence is completed, the ends of the rails can be trimmed with a chainsaw so they line up with eachother. This isn’t necessary for the integrity of the fence, it just looks nice. The two bottom rails will be trimmed to match the the rails above, after the fence is done:
The Final Specs ~
Cost: Half a tank of gas to get poles on the mountain + a few bucks for nails.
Length: This fence is 80 feet. I’m already planning another one.
Time: I worked on and off for about a week, when I could find pockets of time between rainstorms and all my other work.
This fence project started as a challenge to myself and from the simple standpoint of functionality but it grew into something so profoundly wonderful. Build a fence like this, and you can build corrals; with a few additional techniques, you can build a cabin.
And now, not only are my veggies safe from Daisy’s unforgiving hooves, I have an elegant structure that I truly love, and which reminds me, with but a glance, of my own strength and ability ~ and what a smile that brings!
FRISCO.
King Kitten
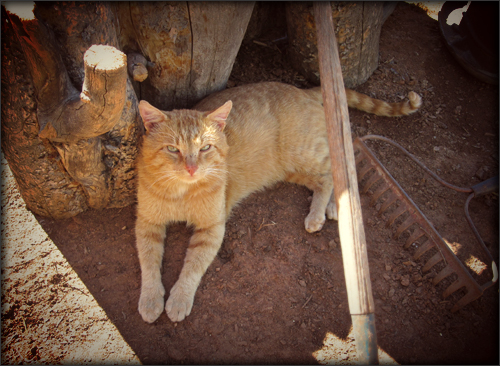
Lounging in the shade as I toil in the sun.
He’s a taskmaster.
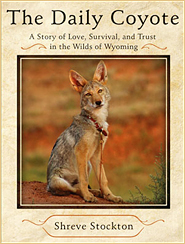
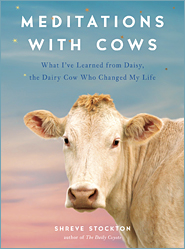
MY NEW BOOK!

More, Elsewhere


- No Tweets Available